This guide demonstrates how to set-up Azure DevOps Releases to deploy an ASP.NET Core website to an Azure Web App Service.
Set-up Azure DevOps Pipeline to Deploy to Azure Web App Service
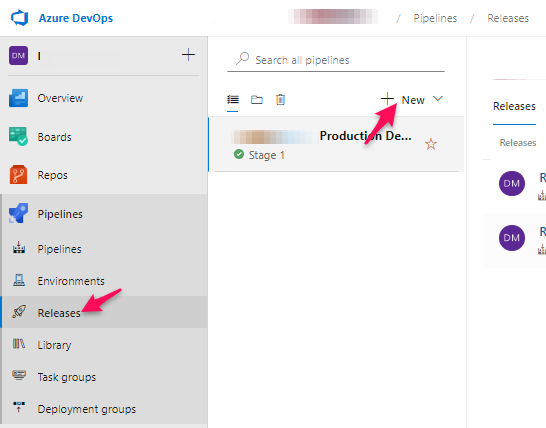
1. Create New Release
Open Azure DevOps within your project, select Releases, and click ”+ New”.
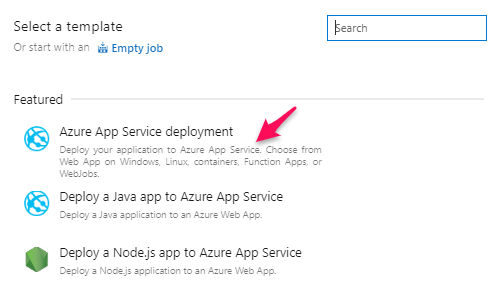
2. Select Template
Choose the “Azure App Service deployment” template from the available options.
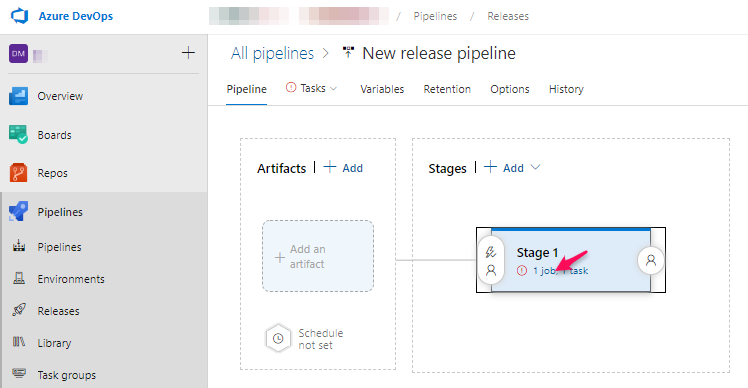
3. Configure Stage
A Release is created with Stage and Artifacts sections. Click “1 job, 1 task” beneath Stage 1 to configure deployment settings.
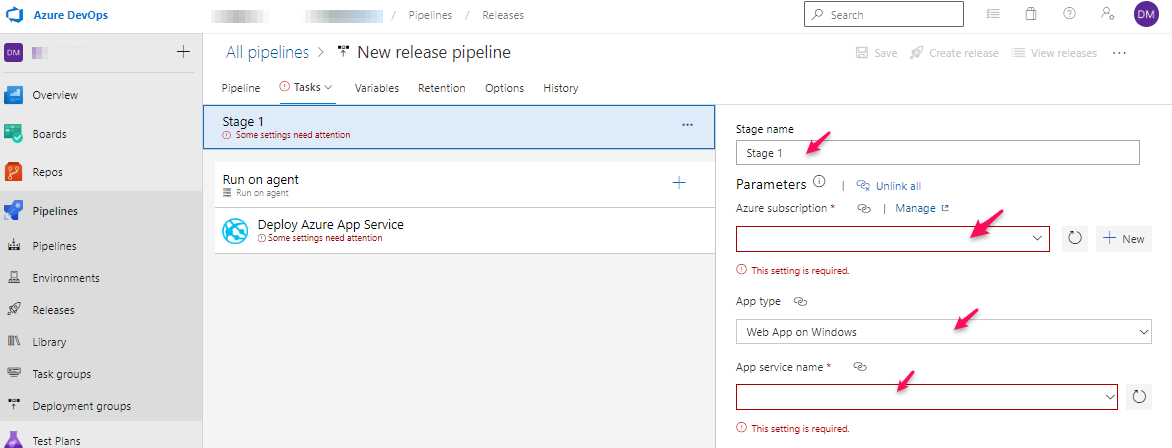
4. Complete Required Fields
- Change the Stage name as desired
- Select your Azure subscription
- Choose App type (Web App on Windows)
- Specify the App service name
- Click the Pipeline tab
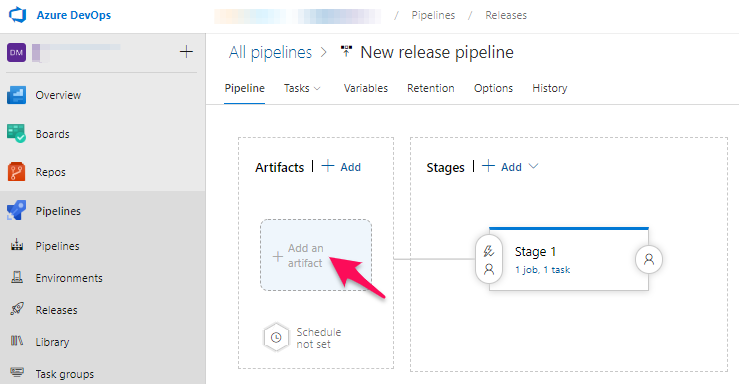
5. Add Artifact
Click “Add an artifact” to specify where the deployment package originates.
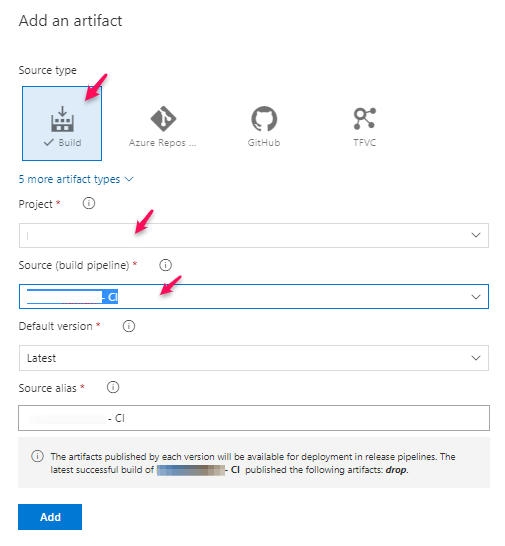
6. Configure Artifact Source
- Select Source type as “Build”
- Choose the Project
- Select the Source (build pipeline) that generates the build artifact
7. Save Configuration
Click the Save button to complete Release setup.

Deploy to Azure Web App Service from Azure DevOps Pipeline
1. Create Release
Open the configured Pipeline and click “Create release” (top right).
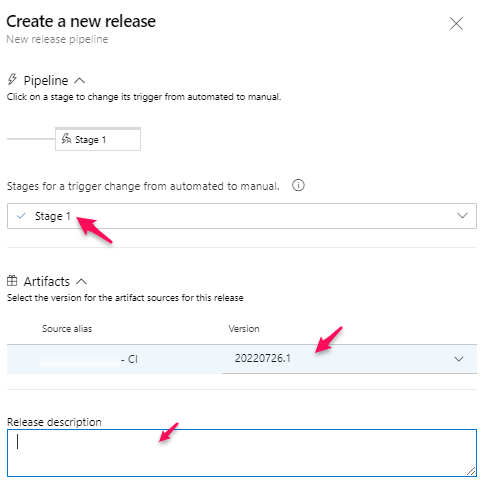
2. Configure Release Details
- Select “Create a new release”
- Choose Stage 1
- Select Artifact Source and Version (latest recommended)
- Add a release description
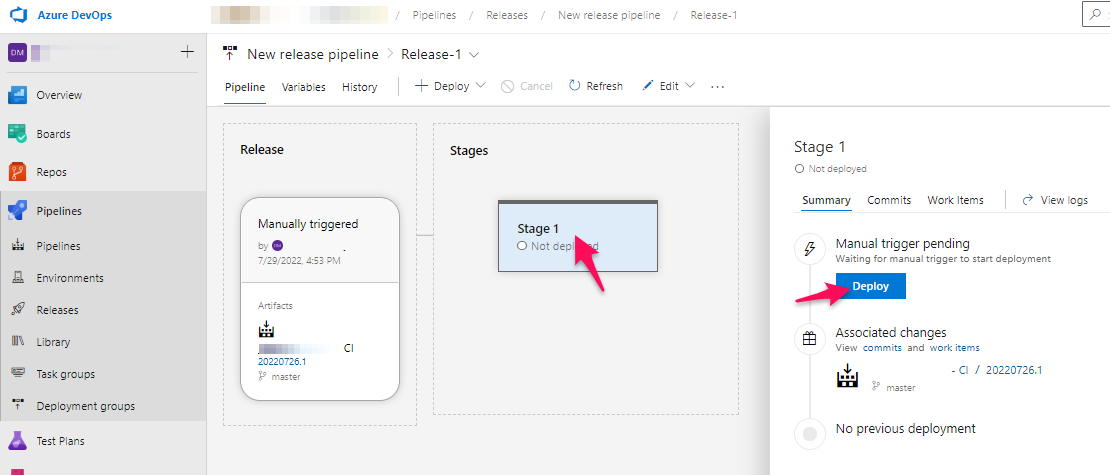
3. Trigger Deployment
Click Stage 1, then click the “Deploy” button.
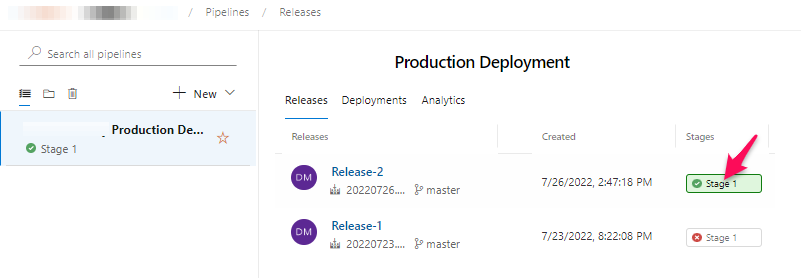
4. Monitor Deployment
Observe the Release queued status; upon successful completion, Stage 1 will display green with a checkmark.
5. Verify Deployment
Visit your website to confirm changes are live.